
Documentation/Automations
Custom flows
Build your own journeys in the visual flow builder.
Automations → Custom Flows is where you build automations with your own triggers, timing, and logic.
The dashboard
The page opens on an overview of your flows — Total Flows, Live, Paused, Draft, and Total Recipients — above a table listing each flow's Name, Trigger, Status, Steps, Recipients, Open Rate, Click Rate, Created date, and Actions.
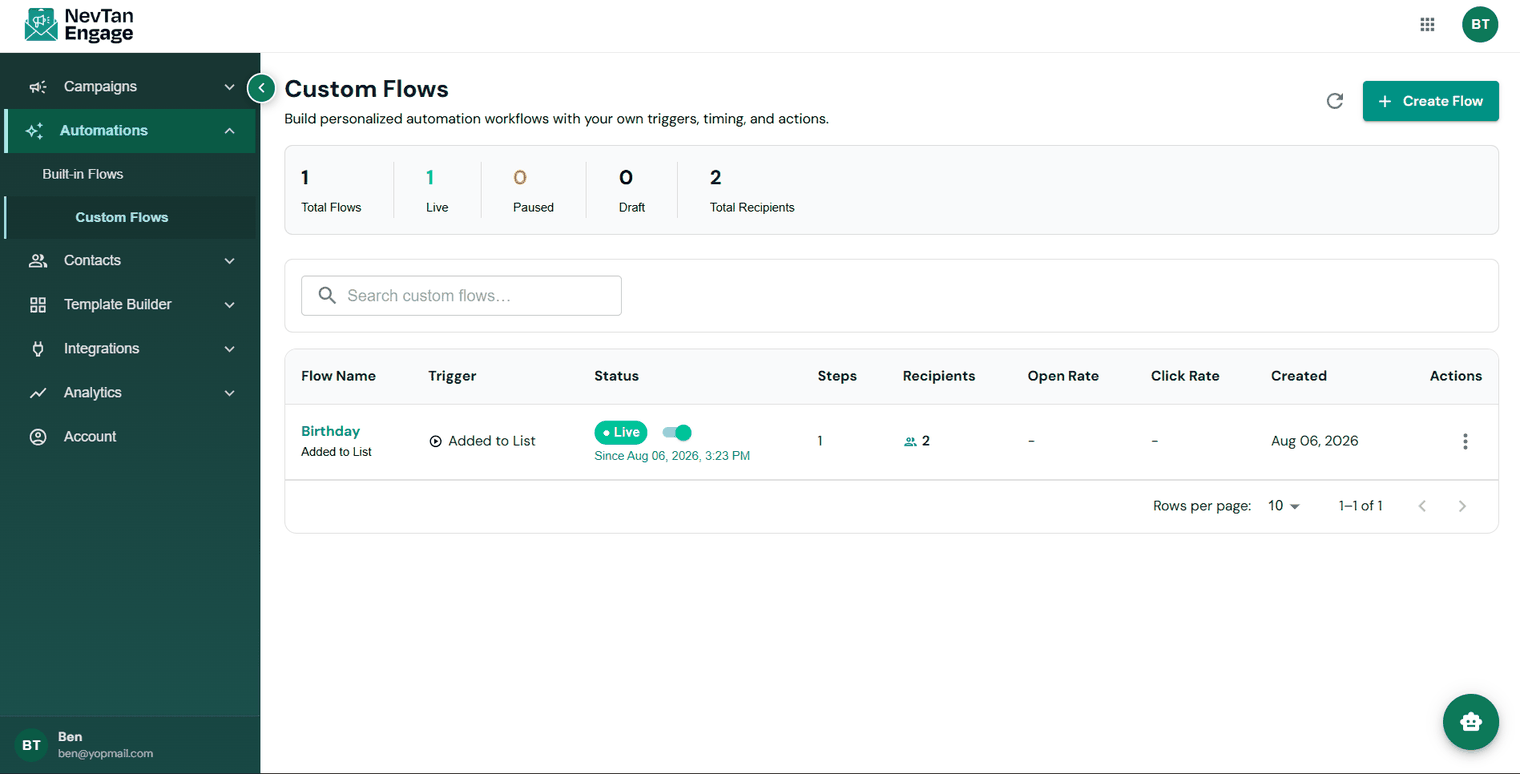
Your flows at a glance
Build a flow
Click Create Flow
The visual builder opens.
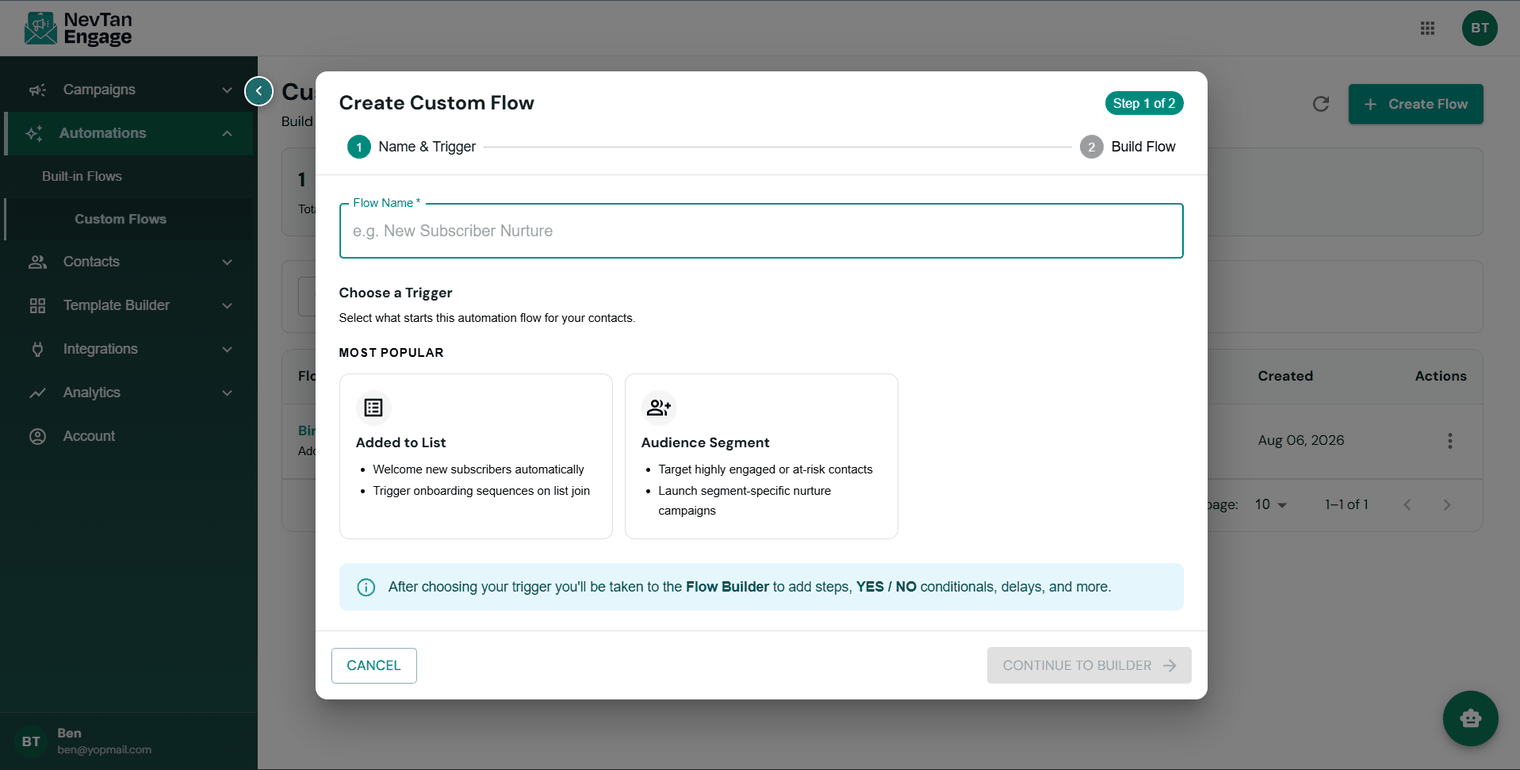
Name your flow
Something you'll recognise later — "Welcome — newsletter" beats "Flow 3".
Choose the trigger
The event that enrolls someone. Two are available today: Added to List — then choose which list — and Audience Segment, which enrolls contacts as they enter a segment.
Add steps
Drag steps onto the canvas in the order they should happen.
Configure each step
Click a step to set its template, delay, or condition.
Save, then activate
Flows start enrolling contacts once they're live.
A flow that branches on a condition
Available steps
| Step | What it does |
|---|---|
| Send Email | Sends an email using a template you choose |
| Send SMS | Sends a text message |
| Time Delay | Pauses before the next step — "wait 2 days" |
| Conditional Split | Splits the path into yes / no branches based on a condition |
| Webhook | Posts to one of your webhook endpoints mid-flow |
| Update Profile | Writes a value onto the contact's profile |
| Filter | Continues only if the contact still meets your criteria |
| Exit Flow | Removes the contact from the flow |
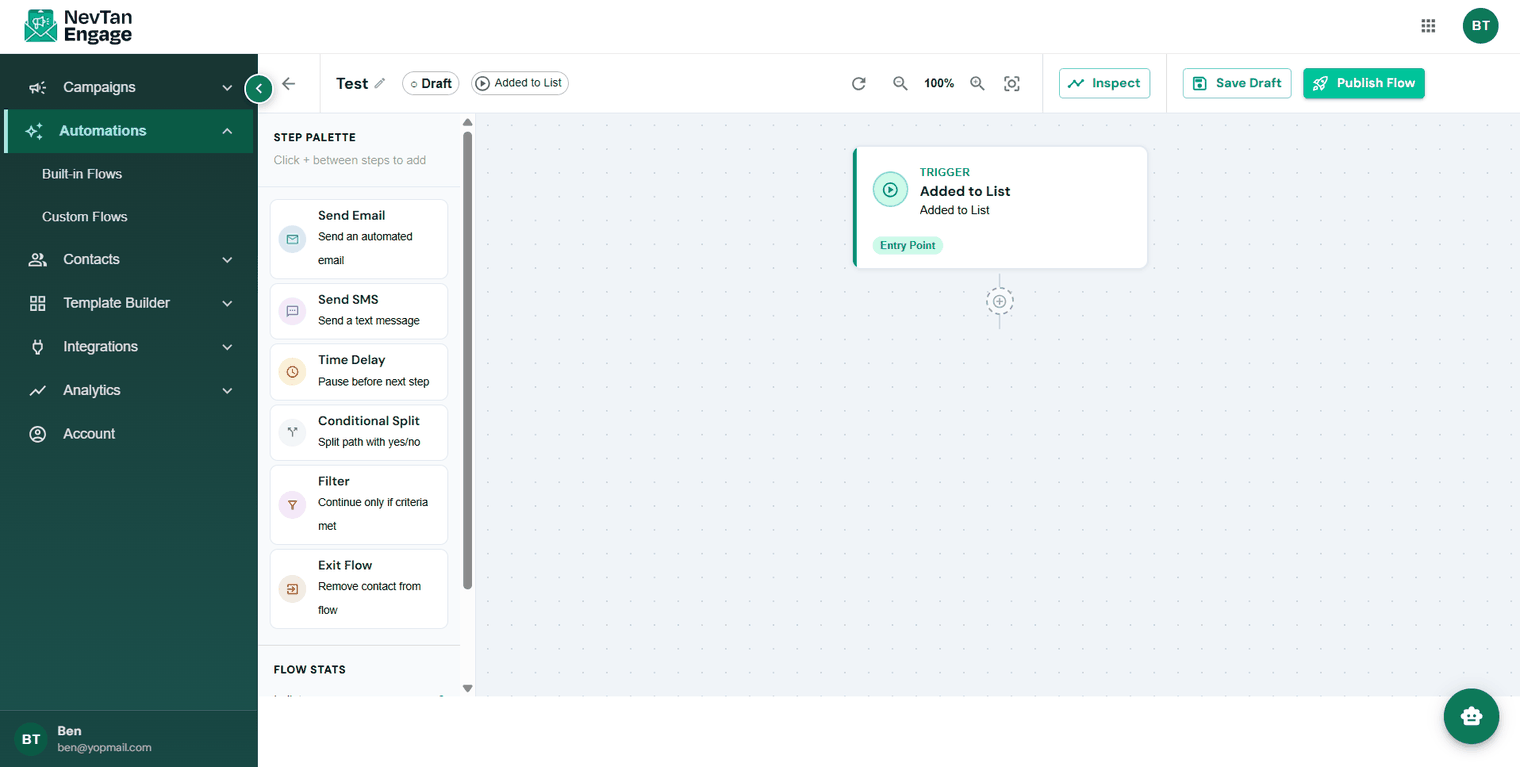
The eight step types
Conditional Split
This is what makes a flow feel personal. *Did they open the first email?* Send a different follow-up down each branch.
Filter
A checkpoint that stops the wrong message going out. In an abandoned-cart flow, filter out anyone who has since completed their purchase — nothing annoys a customer faster than being chased for something they already bought.
Managing flows
- Edit — reopen it in the builder
- Toggle Live / Paused — start or stop enrolling contacts without losing anything
- Duplicate — copy a flow as the basis for another
- Delete — remove it permanently
Pause rather than delete when you're taking a flow out of service temporarily — pausing preserves its history and stats.
Best practices
- Add a Filter before every send in commerce flows.
- Give delays room to breathe. Back-to-back emails feel like spam; 1–3 days between steps is a sensible start.
- Always include an exit condition so people leave once the flow has done its job.
- Test with a small list first. Enroll a few internal addresses and watch the whole journey before going live.
Custom flows require a Professional plan or above.