Set up your NevTan Engage account, authenticate your domain, import contacts, and send your first email campaign.
Updated Jul 15, 2026This guide walks you through the essentials to go from a new NevTan Engage account to your first send. You will create an account, configure sending identity, import an audience, build a template, and launch an email campaign — the same flow most teams complete in 10–15 minutes.
NevTan Engage is a multichannel marketing platform for growing teams. Send email and SMS campaigns, run push and in-app messages, automate flows, segment your audience, and track performance — all from one dashboard.
Sign up for NevTan Engage and log in to your workspace.
Go to the Engage sign-up page and enter your name, company, and work email.
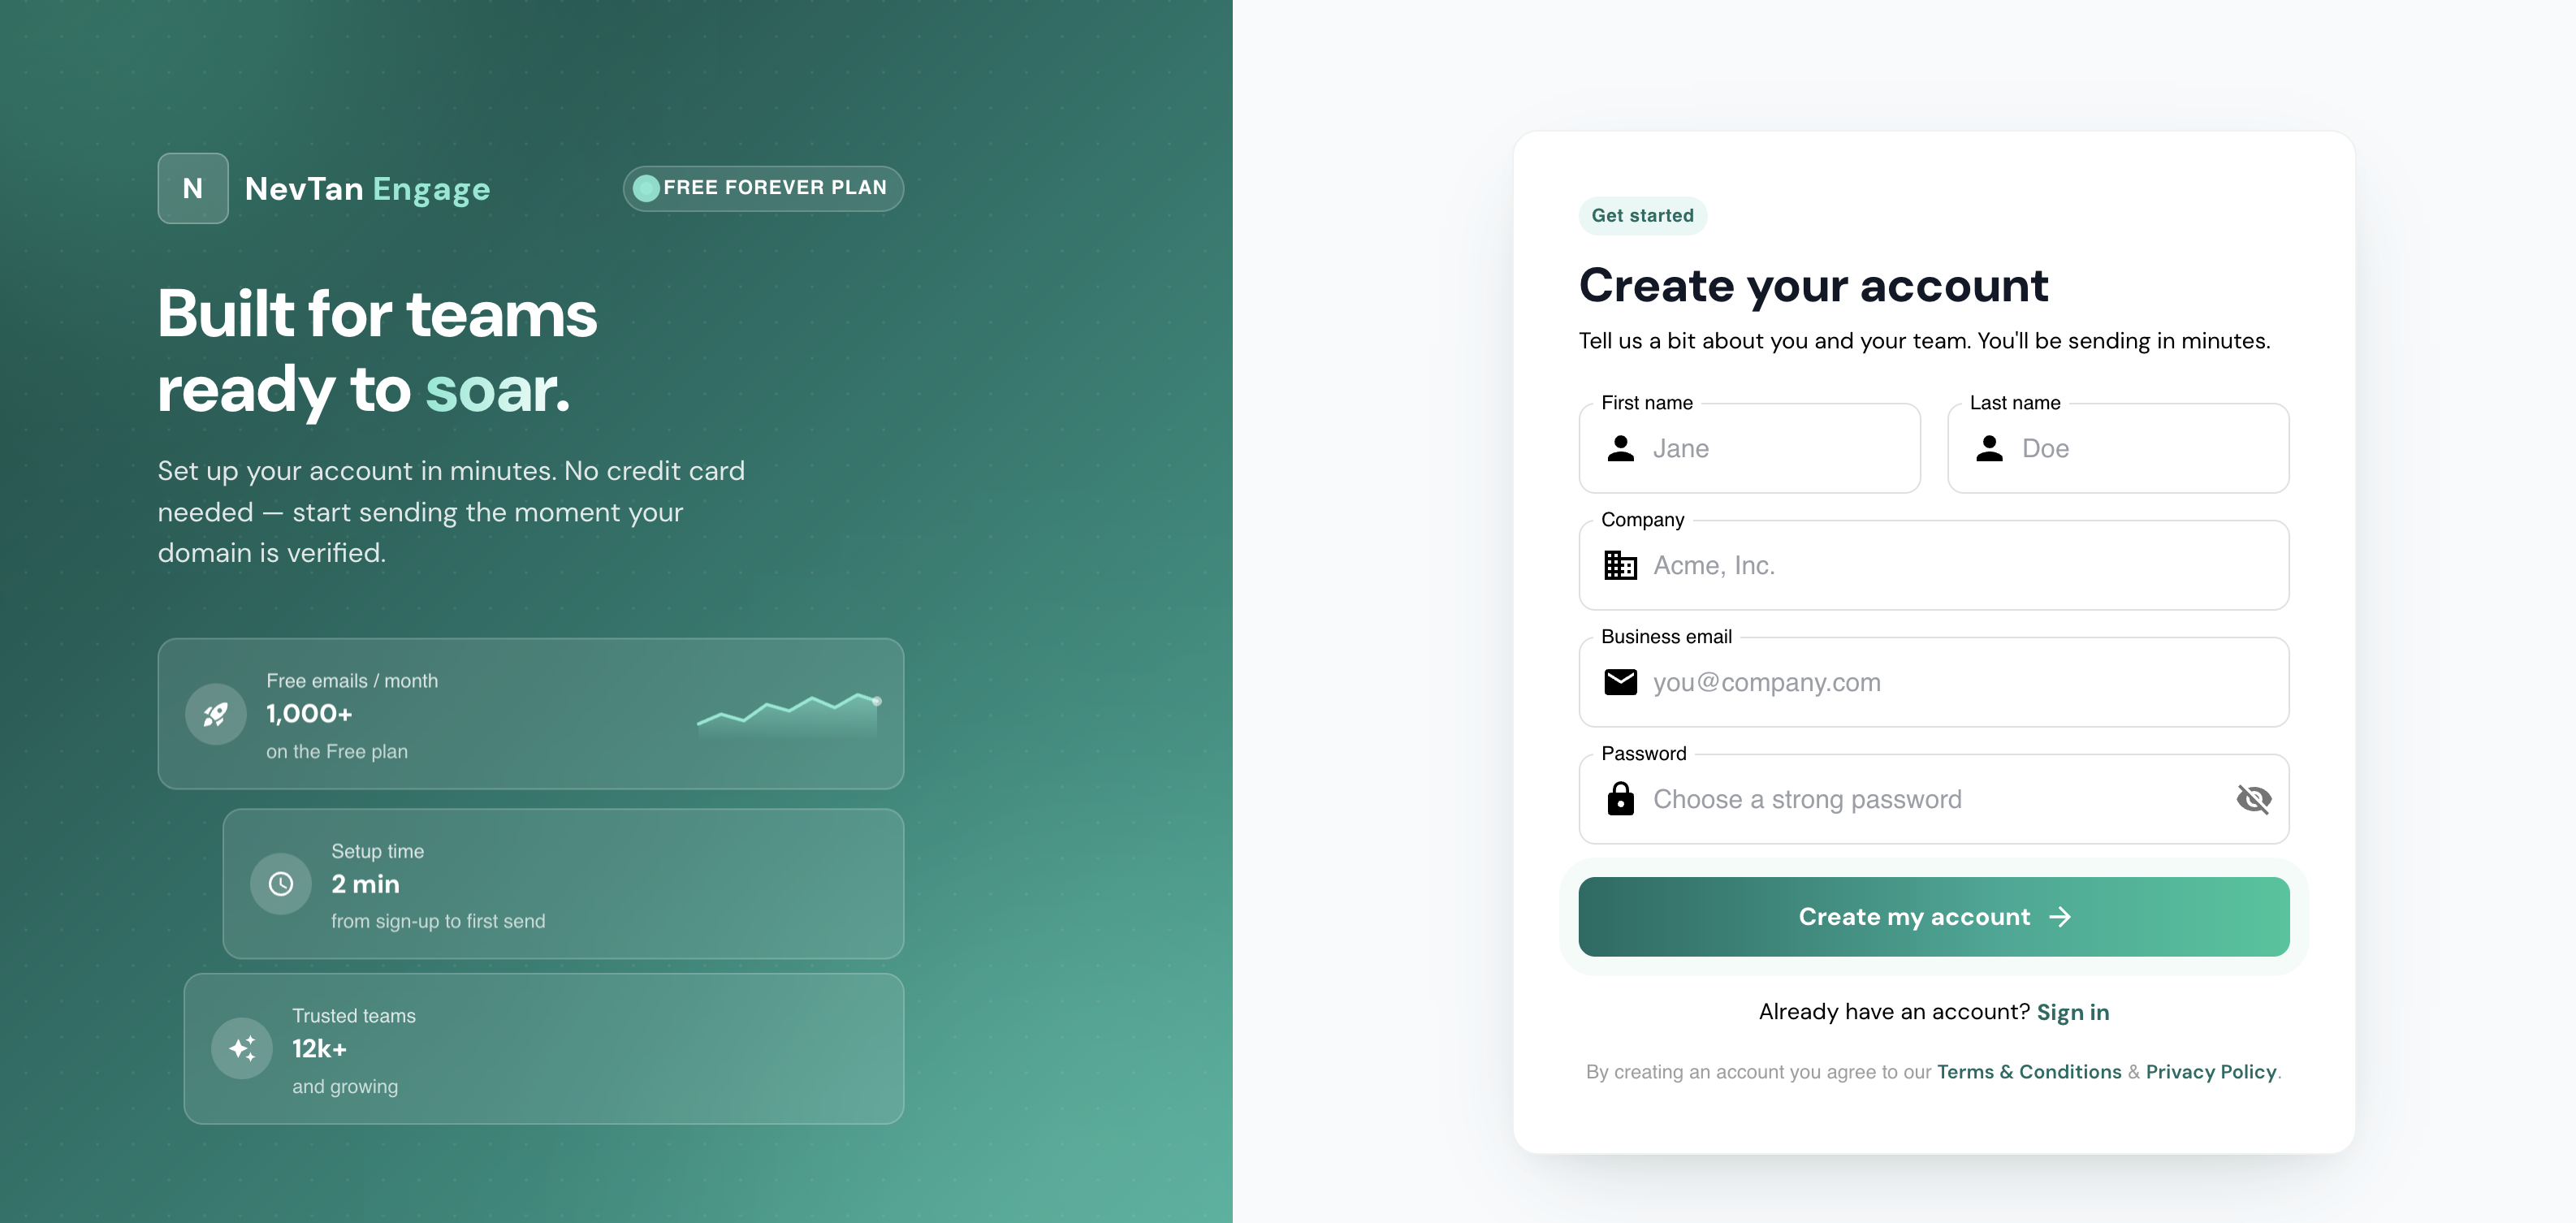 Create your Engage account — no credit card required on the Free plan.
After you submit the form, a Congratulations screen confirms that a verification link was sent to your email. Check your inbox (and spam folder) for the message.
Click the verification link in the email to activate your account.
Go to Login and sign in with the email and password.
You land on Home with the sidebar navigation — you're ready to set up your workspace.
Verify your domain before production sends so messages are trusted by inbox providers.
Go to Account (/account) → Domain Management, enter your domain (e.g. example.com), and click Add Domain.
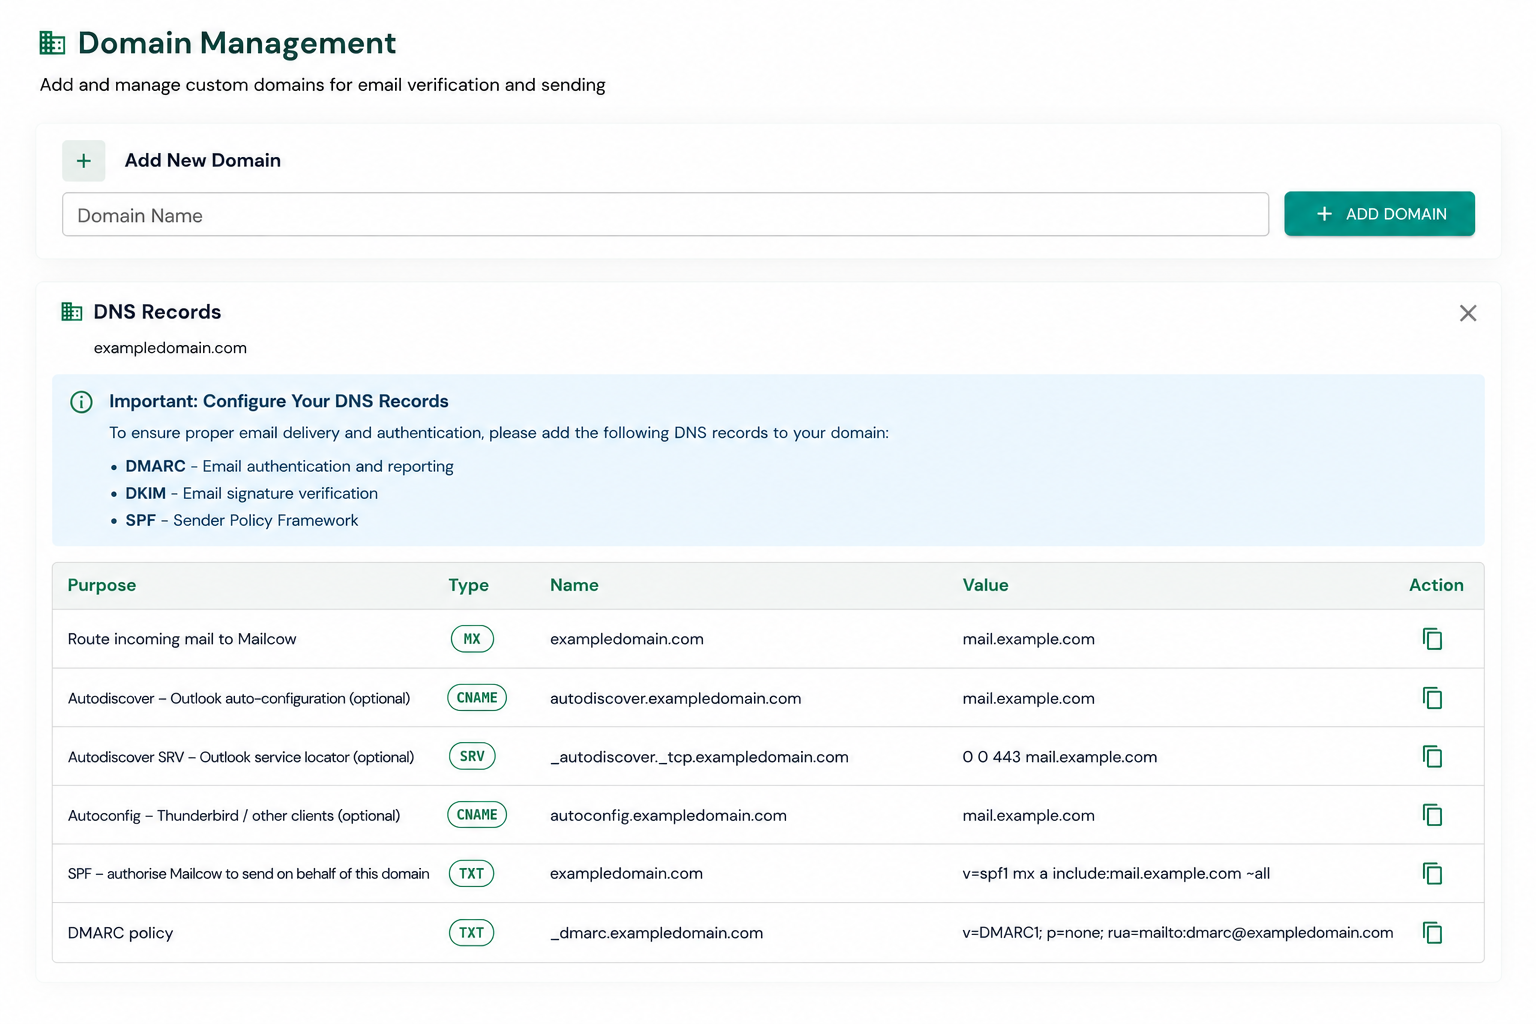 Step 1: Add your domain. Step 2: Copy DNS records to your provider.
Open the DNS Records dialog for your domain. Copy each SPF, DKIM, and DMARC record Engage provides.
Paste the records into your DNS provider, then return to Engage and click Verify. DNS propagation can take up to 48 hours.
Add a sender email on the verified domain so it appears in the campaign message step.
Create a list and add contacts before your first campaign.
Go to Contacts → Lists (/lists). If you don't have a list yet, the table shows You don't have any lists yet — click Create List in the top right.
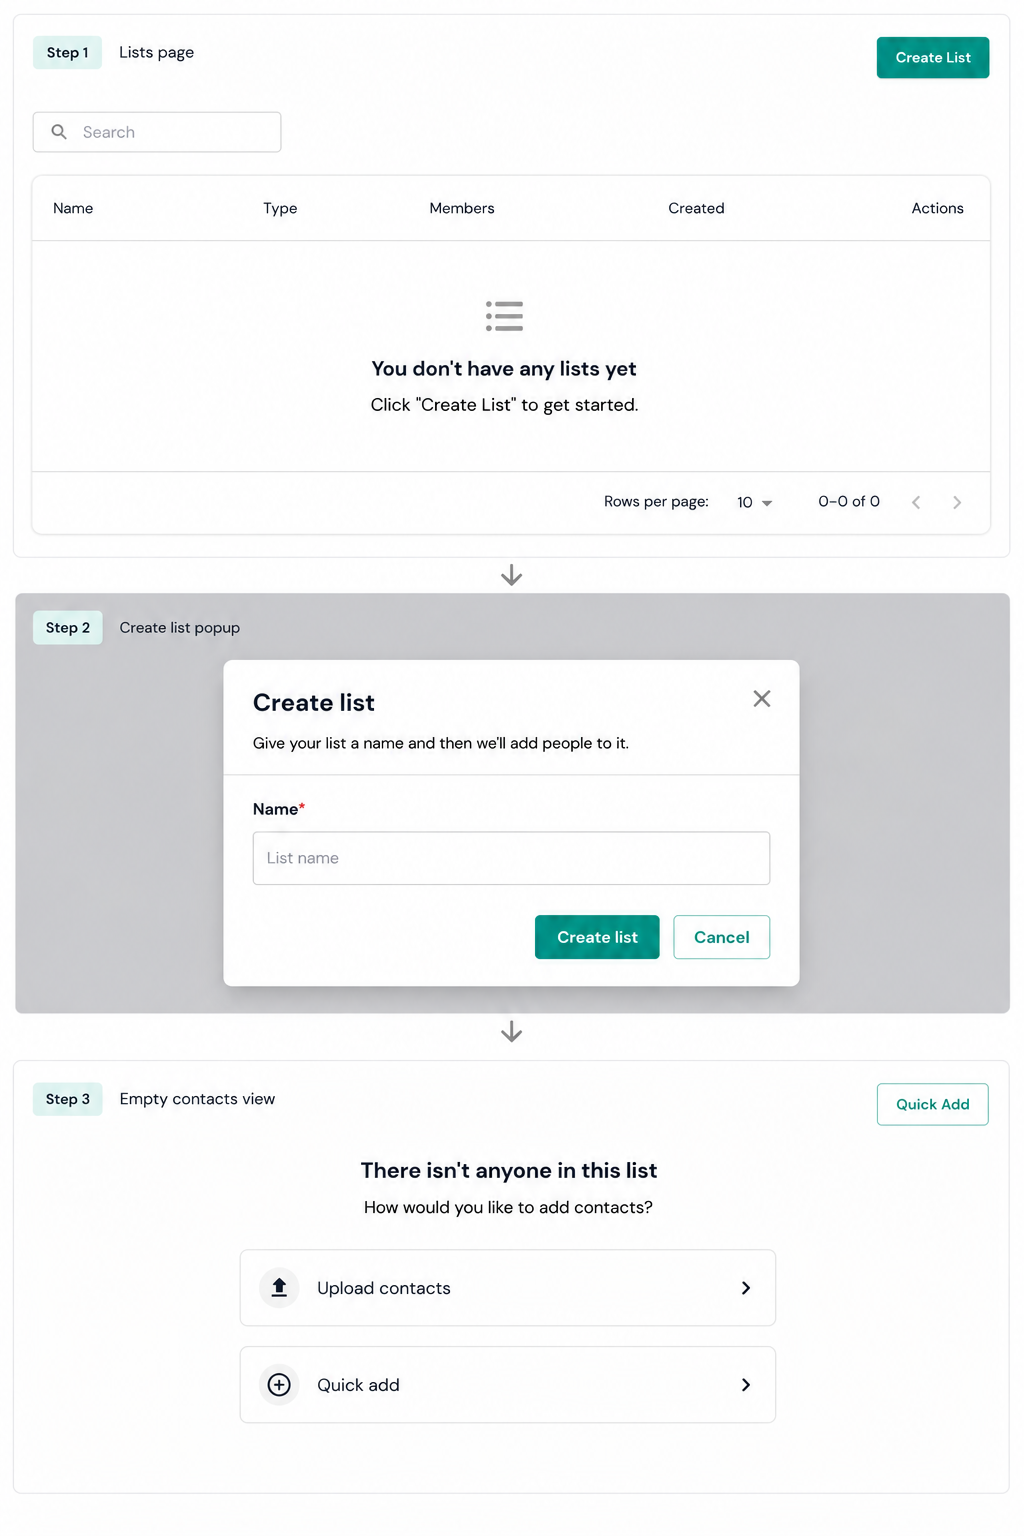 Step 1: Lists page. Step 2: Create list dialog. Step 3: Choose how to add contacts.
In the Create list dialog, enter a Name and click Create list. Engage opens the new list.
On the empty list screen, choose Upload contacts to import a CSV or Quick add to enter contacts one at a time.
For a bulk import, upload a CSV (.csv, up to 50 MB). Each row needs an Email Address or Phone Number. Map columns to profile fields, then confirm the import.
Save time on every campaign by setting up a reusable layout first.
Go to Template Builder → Email Template (/templates). Browse ready-made layouts on Email Library or your own designs on Email Saved. Use Search templates to find one by name.
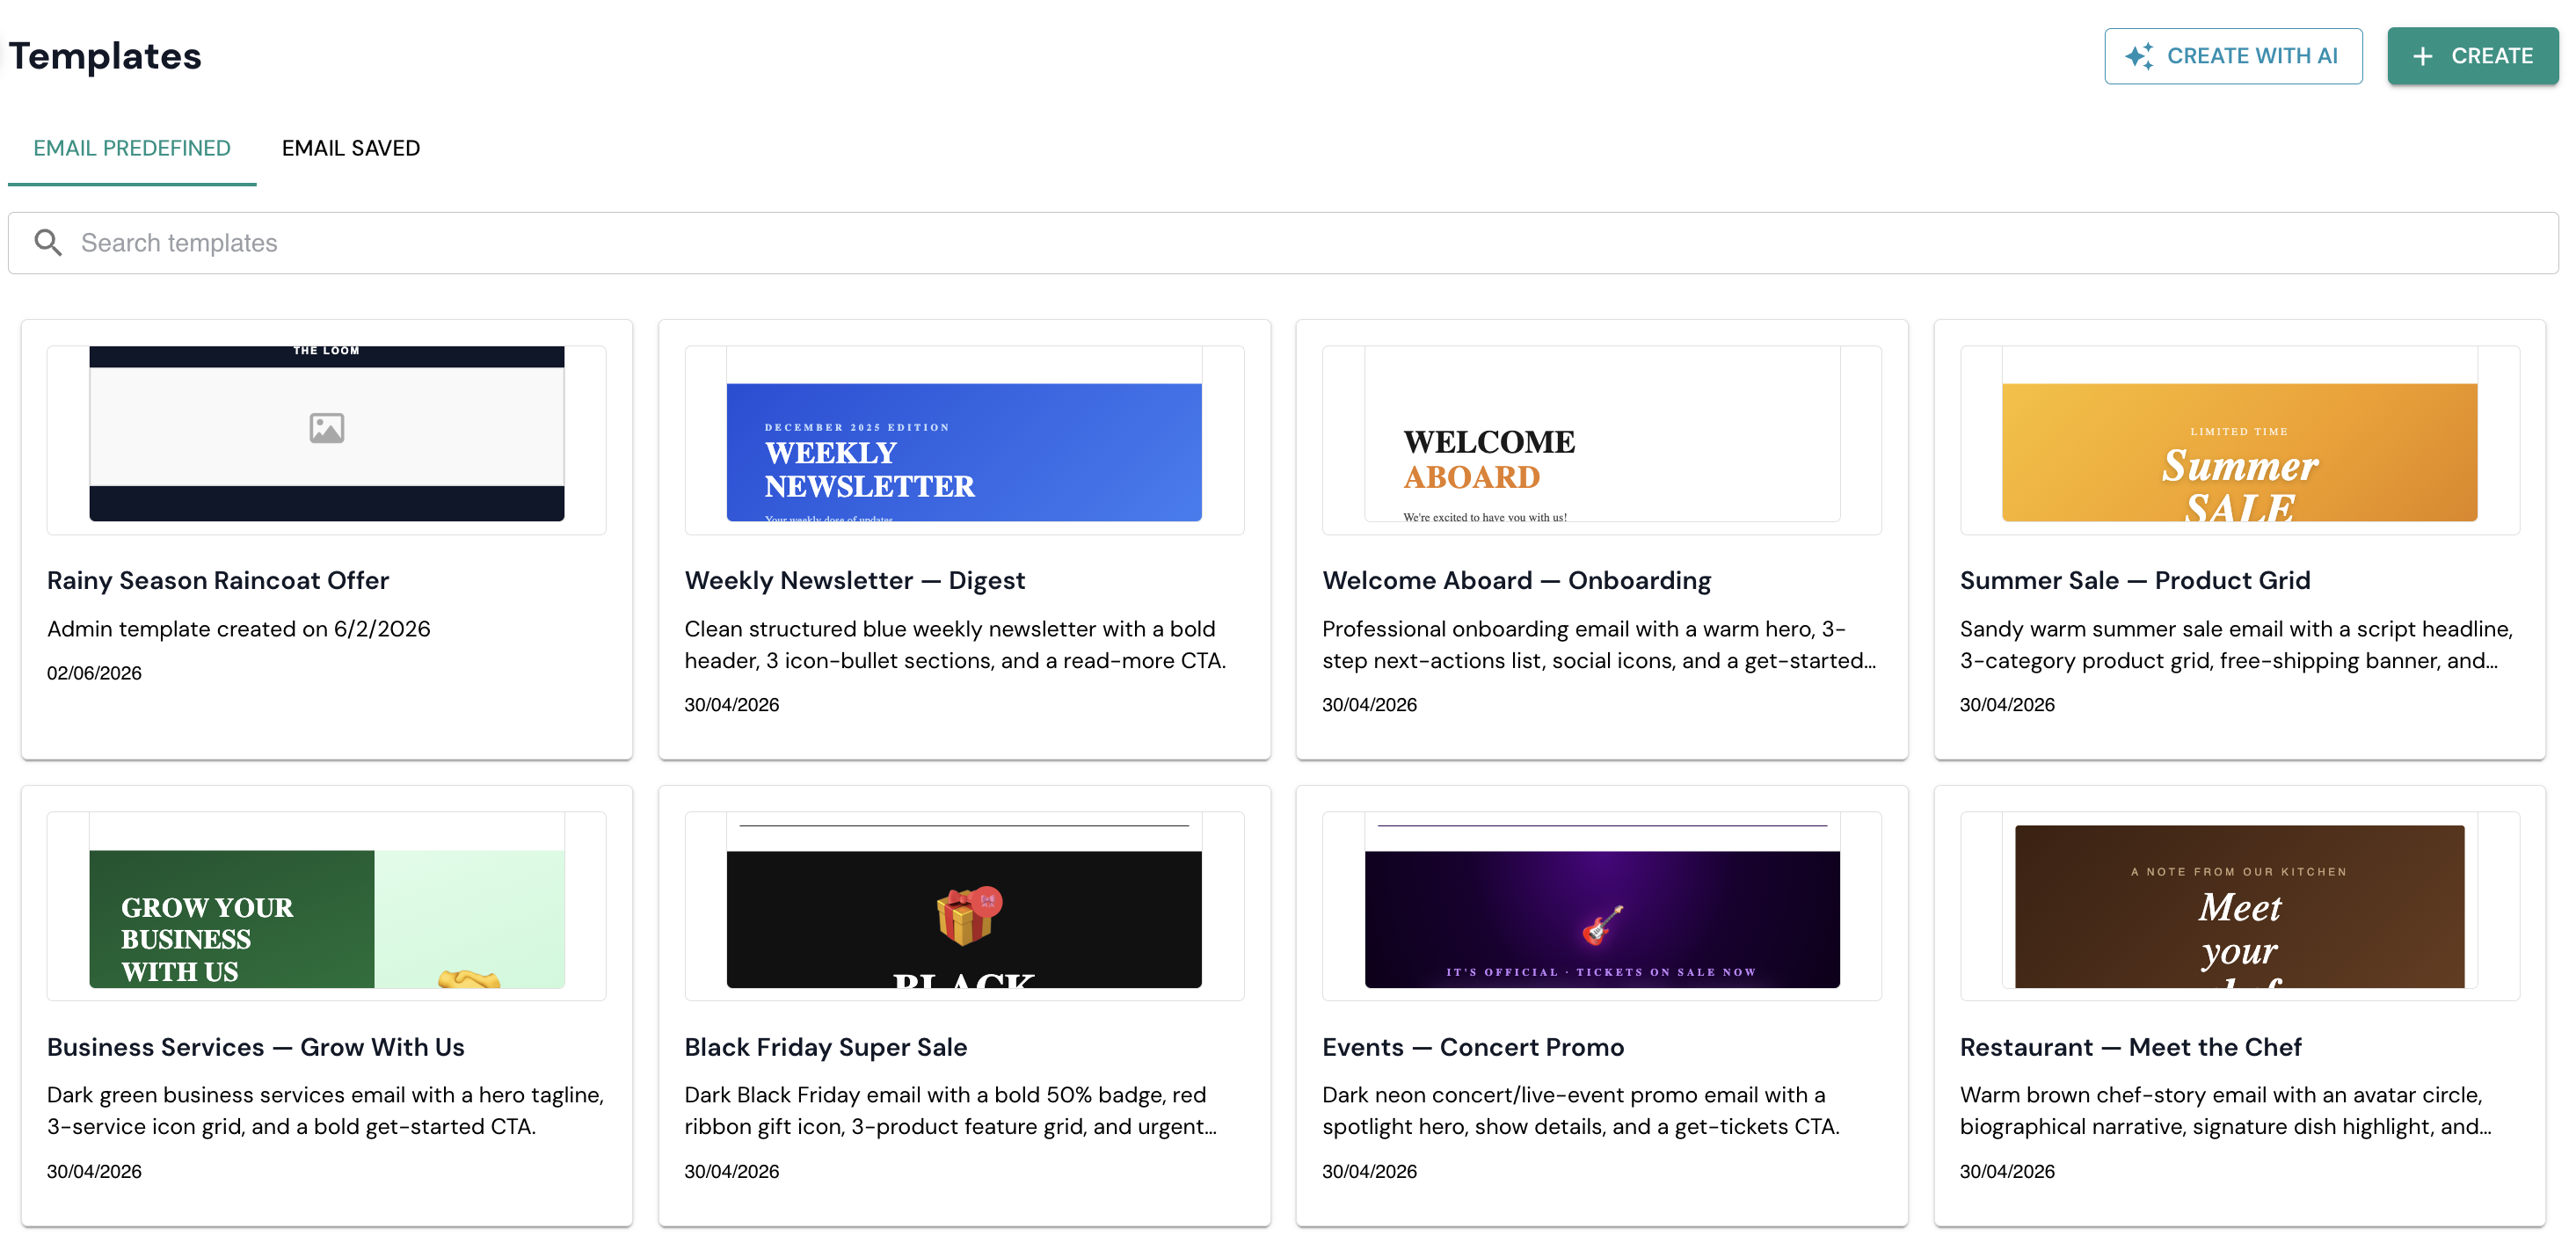 Browse predefined templates or switch to Email Saved for your own designs.
Click Create for a blank template or Create with AI for an AI-assisted starting layout. You can also click a predefined template to preview it and use it as a starting point.
In the Create Template editor, drag blocks from the Content panel — columns, headings, paragraphs, images, buttons, and more — onto the canvas.
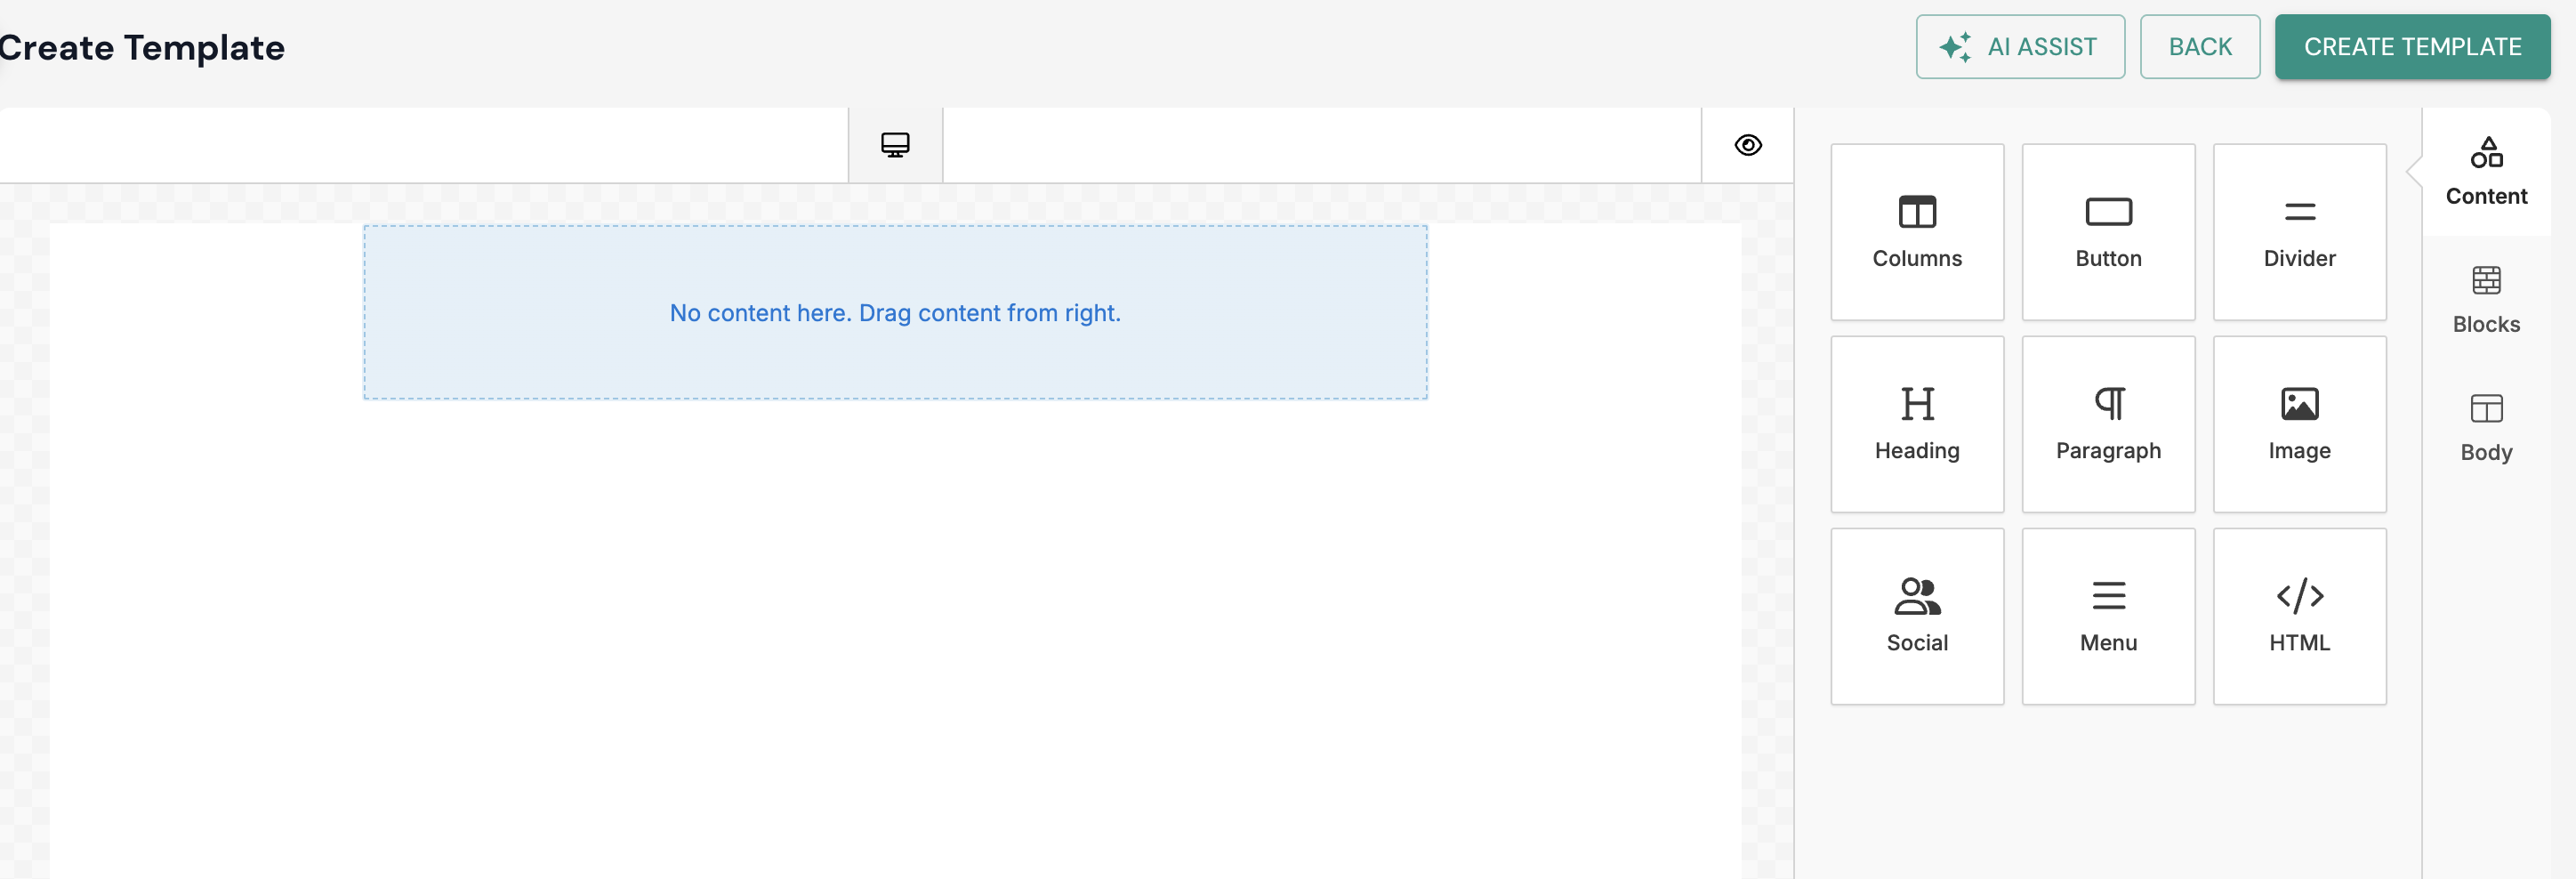 Drag content blocks from the right panel onto the canvas.
Use AI Assist for help writing or refining sections. Switch to Blocks or Body to adjust structure and global styles. Click Create Template when you're done.
Was this article helpful?